설치

백업

mv ~/.config/nvim ~/.config/nvim.bak

Clean neovim folders (Optional but recommended)

mv ~/.local/share/nvim ~/.local/share/nvim.bak
mv ~/.local/state/nvim ~/.local/state/nvim.bak
mv ~/.cache/nvim ~/.cache/nvim.bak

Clone the repository

git clone --depth 1 https://github.com/AstroNvim/AstroNvim ~/.config/nvim
nvim

1. 기본 맵핑 설정변경(기본설정)

`leader key` 가 기본적으로 `SPACEBAR` 로 설정되어 있습니다. 개인적으로는 vim 에서 전통적으로 사용하는 \ 키를 변경하고 싶지않아 변경하였습니다.
  1. lua/astronvim/optionslua ... leader key 설정변경
  2. lua/astronim/mapping.lua ... 기타 키 맵핌 설정
    -- mapleader = " ", -- 기본설정
    mapleader = "\\",k

2. 기타 설정 변경

leader key 변경

~/.config/nvim/lua/user/init/lua에 기타 설정들을 변경할 수 있습니다.

아래샐정은 leaderkey 를 변경하고 , mapping.lua에 설정되어 있는 pane split 기능에 대한 단축키를 disabled 처리 한 것입니다.

return {
  options = {
    g = {
      mapleader = "\\"
    }
  },
  mappings = {
    n = {
      ["|"] = false,
      ["\\"] = false
    }
  },
  plugins = {
    init = {
      { "ofejwpofwpeojf",
        config = function()
          require("rust-tools").setup {
          server = astrovim.lsp.server_settings "rust_analyzer"
          }
      }
    }
  }
}

3. plugin 설치

~/.config/nvim/lua/user/plugins/ 폴더에 플러그인 파일들을 생성하면 자동으로 파일을 읽어들인다.
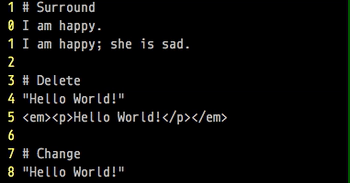
nvim-surround

~/.config/nvim/lua/plugin/nvim-surround.lua에 아래 내용을 삽입

return {
  {
    "kylechui/nvim-surround",
    version ="*",
    event = "VeryLazy",
    config = function()
      require("nvim-surround").setup({
        -- Configuration here, or leave empty to use defaults
      })
    end,
  },
}

i

codeium

~/.config/nvim/lua/plugins/codium.lua 파일에 아래 내용을 추가하고 저장하면, 자동으로 플러그인을 인식한다.

return {
  {
    'Exafunction/codeium.vim',
    event = 'BufEnter',
    config = function ()
    -- Change '<C-g>' here to any keycode you like.
      vim.keymap.set('i', '<C-g>', function () return vim.fn['codeium#Accept']() end, { expr = true })
      vim.keymap.set('i', '<c-;>', function() return vim.fn['codeium#CycleCompletions'](1) end, { expr = true })
      vim.keymap.set('i', '<c-,>', function() return vim.fn['codeium#CycleCompletions'](-1) end, { expr = true })
      vim.keymap.set('i', '<c-x>', function() return vim.fn['codeium#Clear']() end, { expr = true })
      vim.keymap.set("n", "<leader>;", function()
        if vim.g.codeium_enabled == true then
          vim.cmd "CodeiumDisable"
        else
          vim.cmd "CodeiumEnable"
        end
      end, { noremap = true, desc = "Toggle Codeium active" })
    end,
  }
}

vim에 들어가서 명령모드에서 아래와 같이 입력하면, 인증을 시작한다.

:Codeium Auth
반응형

Vim 에디터를 사용하고 있다면, 필수로 사용해야 하는 플러그인이라고 생각된다. 괄호, HTML 태그 및 따옴표 같은 값을 몇번의 단축키를 통해서 입력할 수 있다.

설치

surround.vim in awesome-vim 에서 설치방법을 통해서 설치를 진행한다. 별도의 옵션을 설정할 필요없이 바로 사용할 수 있다.

surround.vim

학습 팁

우선, 플러그인 작동 발식을 이해합니다.

  • 감싸기(surround)(ys)
  • 삭제(delete)(ds)
  • 바꾸기(change)(cs)

그리고, 아래에 나와있는 예제를 따라 가세요. 기본 사항들이 이해가 된다면, 코딩에 직접 하시기 바랍니다.

빠르게 개선하기 위해서는 신중한 연습을 필요로 합니다. 매일 약한 부분(ex: 따옴표로 여러단어 추가)을 파악하고, 관련 예제들을 통해 작업하고, 더 많은 예제를 직접 작성 해 봅니다. 그리고, 반복적인 테스트를 진행하시기 바랍니다. 너무 많이 생각할 필요 없이 {motion}단축키를 입력하세요.

며칠동안 하루에 몇분이라도 작업을 한다면, surround.vim을 빠르게 사용할 수 있게 될 것입니다.

  Old text                  Command     New text ~
  "Hello *world!"           ds"         Hello world!
  [123+4*56]/2              cs])        (123+456)/2
  "Look ma, I'm *HTML!"     cs"<q>      <q>Look ma, I'm HTML!</q>
  if *x>3 {                 ysW(        if ( x>3 ) {
  my $str = *whee!;         vllllS'     my $str = 'whee!';

감싸기

한 단어 감싸기

I am happy.
I am "happy".

ysiw"
(ys: 감싸기; iw: 둘러싸고 싶은 단어 위에 커서가 위치한 상태의 전체 단어; ": "로 감싸기

한 줄 감싸기

I am happy; she is sad.
(I am happy; she is sad.)

yss)
(ys: 감싸기 추가; s: 한줄 선택; ) 한 줄을 괄호로 감싼다 )

Note: 만약 yss(로 입력을 하게 되면 괄호 사이에 공간이 추가 된다. ( I am happy; she is sad. )

태그로 단락 또는 한줄 감싸기

Hello World! How are you?
<p>Hello World! How are you?</p>

yss<p>

(yss: 감쌀(surround) 한줄을 선택; <p> 태그를 추가한다.)

다중 단어 감싸기

I am very very happy.
I am *very very* happy.

ys2aw*

(ys: 감싸기 추가; 2: 감쌀 단어의 숫자; aw: 단어 주위; *: *로 깜싼다)

다중 단어 태그로 감싸기

Hello World! How are you?
<h1>Hello World</h1>! How are you?

ys2aw<h1>

다중 단어 감싸기와 동일하다.

선택 영역 감싸기

The solution is x + y = z. You responded wrongly.
The solution is `x + y = z`. You responded wrongly.

veeeeeS`
커서를 단어 x에 위치한 상태로vVisual Mode로 들어 간 후, S 선택 영역을 `로 감싸기

제거

감싸기 삭제

"Hello World!"
Hello World

ds"
(ds: 감싸기 삭제; ": 쌍따옴표 삭제하기

감싼 태그 제거

<em><p>Hello World!</p></em>
Hello World!

dstdst
감싼 태그를 삭제한다. 커서가 안쪽에 있으면, 안쪽 부터 삭제
바깥에 커서가 위치하고 있으면, 바깥 쪽부터 제거한다.

변경

감싸기 변경

"Hello World!"
*Hello World!*

cs"*
(cs: 감싸기 변경; ": 변경 대상자; *: *로 변경)

태그 변경

<p>Hello World!</p>
<em>Hello World!</em>

cst
(cst: 감싸기 변경 태그; <em>: 새로운 태그명)

일반적인 예제

계산식에 괄호 추가하기

3 + 2 + 5 + 7 / 4    # 괄호가 없기에 계산 결과가 달라진다.
3 + 2 + 5 + 7 / 4    # 3에 커서를 위치한 상태에서 veeeeS)iprint
(3 + 2 + 5 + 7) / 4
(3 + 2 + 5 + 7) / 4
print((3 + 2 + 5 + 7) / 4)

메뉴얼 참조

surround.vim에서 기본으로 제공되고 있는 surround.txt에서도 많은 예문을 찾아 볼 수 있다. 이부분만 한번씩 따라해도 어떻게 사용하는 건지 감이 온다.

Old text에 포함되어 있는 *은 커서의 위치다.

  Old text                  Command     New text ~
  "Hello *world!"           ds"         Hello world!
  [123+4*56]/2              cs])        (123+456)/2
  "Look ma, I'm *HTML!"     cs"<q>      <q>Look ma, I'm HTML!</q>
  if *x>3 {                 ysW(        if ( x>3 ) {
  my $str = *whee!;         vllllS'     my $str = 'whee!';

삭제

  Old text                  Command     New text ~
  "Hello *world!"           ds"         Hello world!
  (123+4*56)/2              ds)         123+456/2
  <div>Yo!*</div>           dst         Yo!

변경

  Old text                  Command     New text ~
  "Hello *world!"           cs"'        'Hello world!'
  "Hello *world!"           cs"<q>      <q>Hello world!</q>
  (123+4*56)/2              cs)]        [123+456]/2
  (123+4*56)/2              cs)[        [ 123+456 ]/2
  <div>Yo!*</div>           cst<p>      <p>Yo!</p>
반응형

vscode 에서 nodejs 코딩을 하다보면 코드를 정렬해 주는 툴 중에 prettier라는 것이 있다. 이 기능을 vim에서도 사용할 수 있는 방법이 있다.

https://vimawesome.com/plugin/vim-prettier-who-speaks 에서 설치하는 방법을 따라서 할 수 있다.

Vundle 을 설치했다고 가정하고.

~/.vimrc 파일에 아래 옵션을 추가 한다

Plugin 'prettier/vim-prettier', { 'do': 'yarn install' }
  1. :w를 통해 저장
  2. :source %명령을 통해 소스를 적용 시킨다.
  3. :PluginInstall 을 통해서 설치한다.

이제 yarn 을 통해서 설치해야 한다.

node 가 설치되어 있고, npm 이 설치 되어 있는 상태에서 진행을 해야 한다.
prettier를 사용하기 위해서는 npm이 필요하다.
$ npm -g install yarn를 통해서 global로 yarn을 설치하자.

vim-prettier가 설치되어 있는 폴더로 이동

$ cd ~/.vim/bundle/vim-prettier/

yarn을 통해서 vim-pretter에 필요한 모듈을 설치

$ yarn

참고
: yarn = yarn install 과 같은 동작을 한다

이제 파일들을 수정하고 난 뒤에

:Prettier명령을 통해서 자동으로 정렬되는 것을 확인 할 수 있다.

Imgur

저장할 때 자동으로 Prettier 적용하기

~/.vimrc파일 에 아래 항목을 추가 한다.

vim 8+ 버전에서

let g:prettier#autoformat = 0
autocmd BufWritePre *.js,*.jsx,*.mjs,*.ts,*.tsx,*.css,*.less,*.scss,*.json,*.graphql,*.md,*.vue,*.yaml,*.html PrettierAsync

기타 옵션에 대해서

VimAwesome페이지에서 더 많은 옵션을 찾을 수 있다.

반응형

vscode를 잘 사용하고 있지만, 왠지 terminal 모드를 잘 사용하고 싶어서 다시 한번 vim에 도전을 해보려고 한다.
예전과 다르게 더 간단히 설치할 수 있게 되었다.

준비

python3 용 vim 설치

mac에 기본적으로 설치되어 있는 것은 python2 버전이다.
vim을 다시 설치 해 준다

$ brew install vim

python3 로 빌드 된 버전이 설치 된다.

Note: brew install vim --with-python3 명령어는 이제 지원하지 않는다.
Note2 : 터미널을 종료하고, 다시 실행시키자. vim이 brew 버전으로 변경된다.

VIM - Vi IMproved 8.1 (2018 May 18, compiled Apr 23 2019 20:00:52)
macOS version
Included patches: 1-1200
Compiled by Homebrew
Huge version without GUI.  Features included (+) or not (-):
+acl               +extra_search      +mouse_netterm     -tag_old_static
+arabic            -farsi             +mouse_sgr         -tag_any_white
+autocmd           +file_in_path      -mouse_sysmouse    -tcl
+autochdir         +find_in_path      +mouse_urxvt       +termguicolors
-autoservername    +float             +mouse_xterm       +terminal
-balloon_eval      +folding           +multi_byte        +terminfo
+balloon_eval_term -footer            +multi_lang        +termresponse
-browse            +fork()            -mzscheme          +textobjects
++builtin_terms    +gettext           +netbeans_intg     +textprop
+byte_offset       -hangul_input      +num64             +timers
+channel           +iconv             +packages          +title
+cindent           +insert_expand     +path_extra        -toolbar
-clientserver      +job               +perl              +user_commands
+clipboard         +jumplist          +persistent_undo   +vartabs
+cmdline_compl     +keymap            +postscript        +vertsplit
+cmdline_hist      +lambda            +printer           +virtualedit
+cmdline_info      +langmap           +profile           +visual
+comments          +libcall           -python            +visualextra
+conceal           +linebreak         +python3           +viminfo
+cryptv            +lispindent        +quickfix          +vreplace
+cscope            +listcmds          +reltime           +wildignore
+cursorbind        +localmap          +rightleft         +wildmenu
+cursorshape       +lua               +ruby              +windows
+dialog_con        +menu              +scrollbind        +writebackup
+diff              +mksession         +signs             -X11
+digraphs          +modify_fname      +smartindent       -xfontset
-dnd               +mouse             +startuptime       -xim
-ebcdic            -mouseshape        +statusline        -xpm
+emacs_tags        +mouse_dec         -sun_workshop      -xsmp
+eval              -mouse_gpm         +syntax            -xterm_clipboard
+ex_extra          -mouse_jsbterm     +tag_binary        -xterm_save
   system vimrc file: "$VIM/vimrc"
     user vimrc file: "$HOME/.vimrc"
 2nd user vimrc file: "~/.vim/vimrc"
      user exrc file: "$HOME/.exrc"
       defaults file: "$VIMRUNTIME/defaults.vim"
  fall-back for $VIM: "/usr/local/share/vim"
Compilation: clang -c -I. -Iproto -DHAVE_CONFIG_H   -DMACOS_X -DMACOS_X_DARWIN  -g -O2 -U_FORTIFY_SOURCE -D_FORTIFY_SOURCE=1       
Linking: clang   -L. -fstack-protector-strong -L/usr/local/lib -L/usr/local/opt/libyaml/lib -L/usr/local/opt/openssl/lib -L/usr/local/opt/readline/lib  -L/usr/local/lib -o vim        -lncurses -liconv -lintl -framework AppKit  -L/usr/local/opt/lua/lib -llua5.3 -mmacosx-version-min=10.14 -fstack-protector-strong -L/usr/local/lib  -L/usr/local/Cellar/perl/5.28.1/lib/perl5/5.28.1/darwin-thread-multi-2level/CORE -lperl -lm -lutil -lc  -L/usr/local/opt/python/Frameworks/Python.framework/Versions/3.7/lib/python3.7/config-3.7m-darwin -lpython3.7m -framework CoreFoundation  -lruby.2.6     

빌드 설치

$ brew install cmake

YouCompleteMe 설치

vim 플러그인 Vundle설치

$ git clone https://github.com/VundleVim/Vundle.vim.git ~/.vim/bundle/Vundle.vim`

참조:https://github.com/VundleVim/Vundle.vim

YoutCompleteMe 설치

Vundle에 플러그인 설치

$ vi ~/.vimrc

아래와 같은 내용을 추가

Plugin 'Valloric/YouCompleteMe' "항목추가

:w 명령어를 통해 저장하고, :PluginInstall 명령어를 통해서 설치한다.

Note: 용량이 크기때문에 시간이 조금 더 걸릴 수 있다.
~/.vim/bundle/YouCompleteMe/폴더를 확인할 수 있다.

YCM 빌드

YouCompleteMe 폴더로 이동

$ cd ~/.vim/bundle/YouCompleteMe

자동완성 기능을 추가하기에 앞서서 어떤 언어를 지원하는지 확인 할수 있다.

$ python3 install.py --help
optional arguments:
  --clang-completer     Enable C-family semantic completion engine through
                        libclang.
  --clangd-completer    Enable C-family semantic completion engine through
                        clangd lsp server.(EXPERIMENTAL)
  --cs-completer        Enable C# semantic completion engine.
  --go-completer        Enable Go semantic completion engine.
  --rust-completer      Enable Rust semantic completion engine.
  --java-completer      Enable Java semantic completion engine.
  --ts-completer        Enable JavaScript and TypeScript semantic completion
                        engine.

여러가지 옵션들이 있지만, 위의 내용만을 참조해서 사용하자.
go와 javascript 언어를 사용하기에 아래와 같은 옵션을 사용했다

$ python3 install.py --go-completer --ts-completer
Searching Python 3.7 libraries...
Found Python library: /usr/local/opt/python/Frameworks/Python.framework/Versions/3.7/lib/python3.7/config-3.7m-darwin/libpython3.7.dylib
Found Python headers folder: /usr/local/opt/python/Frameworks/Python.framework/Versions/3.7/include/python3.7m
-- The C compiler identification is AppleClang 10.0.1.10010046
-- The CXX compiler identification is AppleClang 10.0.1.10010046
-- Check for working C compiler: /Library/Developer/CommandLineTools/usr/bin/cc
-- Check for working C compiler: /Library/Developer/CommandLineTools/usr/bin/cc -- works
-- Detecting C compiler ABI info
-- Detecting C compiler ABI info - done
-- Detecting C compile features
-- Detecting C compile features - done
-- Check for working CXX compiler: /Library/Developer/CommandLineTools/usr/bin/c++
-- Check for working CXX compiler: /Library/Developer/CommandLineTools/usr/bin/c++ -- works
-- Detecting CXX compiler ABI info
-- Detecting CXX compiler ABI info - done
-- Detecting CXX compile features
-- Detecting CXX compile features - done
-- Found PythonLibs: /usr/local/opt/python/Frameworks/Python.framework/Versions/3.7/lib/python3.7/config-3.7m-darwin/libpython3.7.dylib (found suitable version "3.7.3", minimum required is "3.5")
-- NOT using libclang, no semantic completion for C/C++/ObjC will be available
-- NOT using clang-tidy for static analysis.
-- Configuring done
-- Generating done
-- Build files have been written to: /private/var/folders/76/tll39g2x4cz8fyxqk6zxh3_00000gn/T/ycm_build__txi1732
Scanning dependencies of target BoostParts
[  2%] Building CXX object BoostParts/CMakeFiles/BoostParts.dir/libs/filesystem/src/codecvt_error_category.cpp.o
[  7%] Building CXX object BoostParts/CMakeFiles/BoostParts.dir/libs/filesystem/src/path_traits.cpp.o
[  7%] Building CXX object BoostParts/CMakeFiles/BoostParts.dir/libs/filesystem/src/path.cpp.o
[  9%] Building CXX object BoostParts/CMakeFiles/BoostParts.dir/libs/filesystem/src/utf8_codecvt_facet.cpp.o
[ 14%] Building CXX object BoostParts/CMakeFiles/BoostParts.dir/libs/filesystem/src/portability.cpp.o
[ 14%] Building CXX object BoostParts/CMakeFiles/BoostParts.dir/libs/filesystem/src/operations.cpp.o
[ 19%] Building CXX object BoostParts/CMakeFiles/BoostParts.dir/libs/filesystem/src/unique_path.cpp.o
[ 19%] Building CXX object BoostParts/CMakeFiles/BoostParts.dir/libs/filesystem/src/windows_file_codecvt.cpp.o
[ 21%] Building CXX object BoostParts/CMakeFiles/BoostParts.dir/libs/regex/src/c_regex_traits.cpp.o
[ 26%] Building CXX object BoostParts/CMakeFiles/BoostParts.dir/libs/regex/src/fileiter.cpp.o
[ 28%] Building CXX object BoostParts/CMakeFiles/BoostParts.dir/libs/regex/src/cpp_regex_traits.cpp.o
[ 28%] Building CXX object BoostParts/CMakeFiles/BoostParts.dir/libs/regex/src/cregex.cpp.o
[ 30%] Building CXX object BoostParts/CMakeFiles/BoostParts.dir/libs/regex/src/icu.cpp.o
[ 33%] Building CXX object BoostParts/CMakeFiles/BoostParts.dir/libs/regex/src/instances.cpp.o
[ 35%] Building CXX object BoostParts/CMakeFiles/BoostParts.dir/libs/regex/src/posix_api.cpp.o
[ 38%] Building CXX object BoostParts/CMakeFiles/BoostParts.dir/libs/regex/src/regex.cpp.o
[ 40%] Building CXX object BoostParts/CMakeFiles/BoostParts.dir/libs/regex/src/regex_debug.cpp.o
[ 42%] Building CXX object BoostParts/CMakeFiles/BoostParts.dir/libs/regex/src/regex_raw_buffer.cpp.o
[ 45%] Building CXX object BoostParts/CMakeFiles/BoostParts.dir/libs/regex/src/regex_traits_defaults.cpp.o
[ 47%] Building CXX object BoostParts/CMakeFiles/BoostParts.dir/libs/regex/src/static_mutex.cpp.o
[ 50%] Building CXX object BoostParts/CMakeFiles/BoostParts.dir/libs/regex/src/usinstances.cpp.o
[ 52%] Building CXX object BoostParts/CMakeFiles/BoostParts.dir/libs/regex/src/w32_regex_traits.cpp.o
[ 54%] Building CXX object BoostParts/CMakeFiles/BoostParts.dir/libs/regex/src/wc_regex_traits.cpp.o
[ 57%] Building CXX object BoostParts/CMakeFiles/BoostParts.dir/libs/regex/src/wide_posix_api.cpp.o
[ 59%] Building CXX object BoostParts/CMakeFiles/BoostParts.dir/libs/regex/src/winstances.cpp.o
[ 61%] Linking CXX static library libBoostParts.a
/Library/Developer/CommandLineTools/usr/bin/ranlib: file: libBoostParts.a(windows_file_codecvt.cpp.o) has no symbols
/Library/Developer/CommandLineTools/usr/bin/ranlib: file: libBoostParts.a(icu.cpp.o) has no symbols
/Library/Developer/CommandLineTools/usr/bin/ranlib: file: libBoostParts.a(instances.cpp.o) has no symbols
/Library/Developer/CommandLineTools/usr/bin/ranlib: file: libBoostParts.a(regex_debug.cpp.o) has no symbols
/Library/Developer/CommandLineTools/usr/bin/ranlib: file: libBoostParts.a(usinstances.cpp.o) has no symbols
/Library/Developer/CommandLineTools/usr/bin/ranlib: file: libBoostParts.a(w32_regex_traits.cpp.o) has no symbols
/Library/Developer/CommandLineTools/usr/bin/ranlib: file: libBoostParts.a(winstances.cpp.o) has no symbols
[ 61%] Built target BoostParts
Scanning dependencies of target ycm_core
[ 64%] Building CXX object ycm/CMakeFiles/ycm_core.dir/Candidate.cpp.o
[ 66%] Building CXX object ycm/CMakeFiles/ycm_core.dir/CharacterRepository.cpp.o
[ 69%] Building CXX object ycm/CMakeFiles/ycm_core.dir/Character.cpp.o
[ 71%] Building CXX object ycm/CMakeFiles/ycm_core.dir/CandidateRepository.cpp.o
[ 73%] Building CXX object ycm/CMakeFiles/ycm_core.dir/CodePointRepository.cpp.o
[ 78%] Building CXX object ycm/CMakeFiles/ycm_core.dir/IdentifierDatabase.cpp.o
[ 78%] Building CXX object ycm/CMakeFiles/ycm_core.dir/CodePoint.cpp.o
[ 80%] Building CXX object ycm/CMakeFiles/ycm_core.dir/IdentifierCompleter.cpp.o
[ 83%] Building CXX object ycm/CMakeFiles/ycm_core.dir/IdentifierUtils.cpp.o
[ 88%] Building CXX object ycm/CMakeFiles/ycm_core.dir/PythonSupport.cpp.o
[ 88%] Building CXX object ycm/CMakeFiles/ycm_core.dir/Result.cpp.o
[ 90%] Building CXX object ycm/CMakeFiles/ycm_core.dir/Utils.cpp.o
[ 92%] Building CXX object ycm/CMakeFiles/ycm_core.dir/Word.cpp.o
[ 95%] Building CXX object ycm/CMakeFiles/ycm_core.dir/versioning.cpp.o
[ 97%] Building CXX object ycm/CMakeFiles/ycm_core.dir/ycm_core.cpp.o
[100%] Linking CXX shared library /Users/forteleaf/.vim/bundle/YouCompleteMe/third_party/ycmd/ycm_core.so
[100%] Built target ycm_core
-- The C compiler identification is AppleClang 10.0.1.10010046
-- Check for working C compiler: /Library/Developer/CommandLineTools/usr/bin/cc
-- Check for working C compiler: /Library/Developer/CommandLineTools/usr/bin/cc -- works
-- Detecting C compiler ABI info
-- Detecting C compiler ABI info - done
-- Detecting C compile features
-- Detecting C compile features - done
-- Found PythonLibs: /usr/local/opt/python/Frameworks/Python.framework/Versions/3.7/lib/python3.7/config-3.7m-darwin/libpython3.7.dylib (found version "3.7.3")
-- Configuring done
-- Generating done
-- Build files have been written to: /private/var/folders/76/tll39g2x4cz8fyxqk6zxh3_00000gn/T/regex_build_5gvorctk
Scanning dependencies of target _regex
[ 66%] Building C object CMakeFiles/_regex.dir/regex_3/_regex_unicode.c.o
[ 66%] Building C object CMakeFiles/_regex.dir/regex_3/_regex.c.o
[100%] Linking C shared library /Users/forteleaf/.vim/bundle/YouCompleteMe/third_party/ycmd/third_party/cregex/regex_3/_regex.so
[100%] Built target _regex
/Users/forteleaf/.vim/bundle/YouCompleteMe/third_party/ycmd/third_party/tsserver/bin/tsc -> /Users/forteleaf/.vim/bundle/YouCompleteMe/third_party/ycmd/third_party/tsserver/lib/node_modules/typescript/bin/tsc
/Users/forteleaf/.vim/bundle/YouCompleteMe/third_party/ycmd/third_party/tsserver/bin/tsserver -> /Users/forteleaf/.vim/bundle/YouCompleteMe/third_party/ycmd/third_party/tsserver/lib/node_modules/typescript/bin/tsserver
+ typescript@3.3.3333
updated 1 package in 0.641s
반응형

#쓸데없는짓

CentOS7 에 VIM8 설치하기

기본적으로 vim 7 버전이 설치되어 있지만, 사람은 최신 문물을 사용하고 싶은 것이다. 그래서 찾아보다가 잘 못 된 정보도 있고 해서 글을 남긴다.
없어진 repository 를 추가하는 일이 없었으면 한다.

Repository 추가

# curl -L https://copr.fedorainfracloud.org/coprs/unixcommunity/vim/repo/epel-7/unixcommunity-vim-epel-7.repo -o /etc/yum.repos.d/unixcommunity-vim-epel-7.repo

Update

# sudo yum update vim*

이렇게 하면 알아서 설치가 된다.

반응형

+ Recent posts