
kubernetes_gcloud_1_docker_introduce
이 실습은 입문용이며, Docker 및 컨테이너 사용 경험이 거의 없거나 전혀 없는 사용자를 대상으로 합니다. Cloud Shell 및 명령줄을 잘 안다면 좋지만 필수 사항은 아닙니다. 이 서비스 영역에 관해 좀 더 고급 단계의 자료를 찾고 있는 경우 다음 실습을 확인하세요.
준비가 됐으면 아래로 스크롤하여 실습 환경을 설정하세요.
- qwiklabs-gcp-03-b18cb4608533
- ACCOUNT: student-02-32afeda26918@qwiklabs.net
$ docker run hello-world
student_02_32afeda26918@cloudshell:~ (qwiklabs-gcp-03-b18cb4608533)$ docker run hello-world
Hello from Docker!
This message shows that your installation appears to be working correctly.
To generate this message, Docker took the following steps:
- The Docker client contacted the Docker daemon.
- The Docker daemon pulled the "hello-world" image from the Docker Hub.
(amd64) - The Docker daemon created a new container from that image which runs the
executable that produces the output you are currently reading. - The Docker daemon streamed that output to the Docker client, which sent it
to your terminal.
To try something more ambitious, you can run an Ubuntu container with:
$ docker run -it ubuntu bash
Share images, automate workflows, and more with a free Docker ID:
https://hub.docker.com/
For more examples and ideas, visit:
https://docs.docker.com/get-started/
### docker build
```bash
cat > Dockerfile <<EOF
# Use an official Node runtime as the parent image
FROM node:lts
# Set the working directory in the container to /app
WORKDIR /app
# Copy the current directory contents into the container at /app
ADD . /app
# Make the container's port 80 available to the outside world
EXPOSE 80
# Run app.js using node when the container launches
CMD ["node", "app.js"]
EOF
이 파일에서는 Docker 데몬에 이미지를 빌드하는 방법을 안내합니다.
- 첫 번째 줄은 기본 상위 이미지를 지정합니다. 이 경우 기본 상위 이미지는 노드 버전 장기적 지원(LTS)의 공식 Docker 이미지입니다.
- 두 번째 줄에서 컨테이너의 (현재) 작업 디렉터리를 설정합니다.
- 세 번째 줄에서는 현재 디렉터리의 콘텐츠(
"."로 표시)를 컨테이너에 추가합니다. - 그런 다음 컨테이너의 포트를 공개하여 해당 포트에서의 연결을 허용하고 마지막으로 노드 명령어를 실행하여 애플리케이션을 시작합니다.
참고: 시간을 내어 Dockerfile 명령어 참조를 검토하고
Dockerfile의 각 줄을 숙지하세요.
- 다음 명령어를 실행하여 노드 애플리케이션을 생성합니다.
$ cat > app.js <<EOF
const http = require('http');
const hostname = '0.0.0.0';
const port = 80;
const server = http.createServer((req, res) => {
    res.statusCode = 200;
    res.setHeader('Content-Type', 'text/plain');
    res.end('Hello World\n');
});
server.listen(port, hostname, () => {
    console.log('Server running at http://%s:%s/', hostname, port);
});
process.on('SIGINT', function() {
    console.log('Caught interrupt signal and will exit');
    process.exit();
});
EOF
포트 80에서 수신 대기하고 'Hello World'를 반환하는 간단한 HTTP 서버입니다.
이제 이미지를 빌드합니다.
- 다음 명령어를 Dockerfile이 있는 디렉터리에서 실행해야 합니다. 현재 디렉터리를 의미하는
"."에 다시 한번 유의하세요.
$ docker build -t node-app:0.1 .

[+] Building 12.3s (4/7)
 => [internal] load build definition from Dockerfile                                                                                                                                  0.1s
 => => transferring dockerfile: 393B                                                                                                                                                  0.0s
 => [internal] load .dockerignore                                                                                                                                                     0.1s
 => => transferring context: 2B
...-t는 name:tag 문법을 사용하여 이미지의 이름과 태그를 지정하는 역할을 합니다. 이미지 이름은 node-app이고 태그는 0.1입니다. Docker 이미지를 빌드할 때는 태그를 사용하는 것이 좋습니다. 태그를 지정하지 않으면 태그가 기본값인 latest로 지정되어 최신 이미지와 기존 이미지를 구분하기 어려워집니다. 또한 이미지를 빌드할 때 위 Dockerfile의 각 행을 통해 중간 컨테이너 레이어가 만들어지는 방식을 확인하세요.
- 이제 다음 명령어를 실행하여 빌드한 이미지를 봅니다.
$ docker imagesnode는 기본 이미지이고 node-app은 빌드한 이미지입니다. node를 삭제하려면 우선 node-app을 삭제해야 합니다. 이미지의 크기는 VM에 비해 상대적으로 작습니다. node:slim 및 node:alpine과 같은 노드 이미지의 다른 버전을 사용하면 더 작은 이미지를 제공하여 이식성을 높일 수 있습니다. 컨테이너 크기 줄이기에 관해서는 고급 주제에서 자세히 설명하겠습니다. 노드의 공식 저장소에서 모든 버전을 확인할 수 있습니다.
docker run
- 이 모듈에서는 다음 코드를 사용하여 빌드한 이미지를 기반으로 하는 컨테이너를 실행합니다.
$ docker run -p 4000:80 --name my-app node-app:0.1--name 플래그를 사용하면 원하는 경우 컨테이너 이름을 지정할 수 있습니다. -p는 Docker가 컨테이너의 포트 80에 호스트의 포트 4000을 매핑하도록 지시하는 플래그입니다. 이제 http://localhost:4000에서 서버에 접속할 수 있습니다. 포트 매핑이 없으면 localhost에서 컨테이너에 접속할 수 없습니다.
- 다른 터미널을 열고(Cloud Shell에서
+아이콘을 클릭) 서버를 테스트합니다.
$ curl http://localhost:4000초기 터미널이 실행되는 동안 컨테이너가 실행됩니다. 컨테이너를 터미널 세션에 종속시키지 않고 백그라운드에서 실행하려면 -d 플래그를 지정해야 합니다.
- 초기 터미널을 닫은 후 다음 명령어를 실행하여 컨테이너를 중지하고 삭제합니다.
$ docker stop my-app && docker rm my-app- 이제 다음 명령어를 실행하여 백그라운드에서 컨테이너를 시작합니다.
$ docker run -p 4000:80 --name my-app -d node-app:0.1
docker ps
이제 애플리케이션을 수정합니다.
- Cloud Shell에서 앞서 실습에서 만든 테스트 디렉터리를 엽니다.
$ cd test- 원하는 텍스트 편집기(예: nano 또는 vim)로
app.js를 편집하고 'Hello World'를 다른 문자열로 바꿉니다.
....
const server = http.createServer((req, res) => {
    res.statusCode = 200;
    res.setHeader('Content-Type', 'text/plain');
    res.end('Welcome to Cloud\n');
});
....- 이 새 이미지를 빌드하고
0.2로 태그를 지정합니다.
$ docker build -t node-app:0.2 .2단계에서 기존 캐시 레이어를 사용하고 있음을 확인할 수 있습니다. 3단계 이후부터는 app.js를 변경했기 때문에 레이어가 수정되었습니다.
- 새 이미지 버전으로 다른 컨테이너를 실행합니다. 이때 호스트 포트를 80 대신 8080으로 매핑하는 방법을 확인하세요. 호스트 포트 4000은 이미 사용 중이므로 사용할 수 없습니다.
$ docker run -p 8080:80 --name my-app-2 -d node-app:0.2
docker ps- 컨테이너를 테스트합니다.
- 이제 처음 작성한 컨테이너를 테스트합니다.
$ curl http://localhost:4000
Debug
docker logs [container_id]를 사용하여 컨테이너의 로그를 볼 수 있습니다. 컨테이너가 실행 중일 때 로그 출력을 확인하려면-f옵션을 사용합니다.
$ docker logs -f [container_id]

Server running at http://0.0.0.0:80/
실행 중인 컨테이너에서 대화형 Bash 세션을 시작해야 할 수 있습니다.
- 이 경우
docker exec를 사용합니다. 다른 터미널을 열고(Cloud Shell에서 + 아이콘을 클릭) 다음 명령어를 입력합니다.
$ docker exec -it [container_id] bash

root@27baedf72cfe:/app#
-it 플래그는 pseudo-tty를 할당하고 stdin을 열린 상태로 유지하여 컨테이너와 상호작용할 수 있도록 합니다. Dockerfile에 지정된 WORKDIR 디렉터리(/app)에서 bash가 실행된 것을 확인할 수 있습니다. 이제 디버깅할 컨테이너 내에서 대화형 셸 세션을 사용할 수 있습니다.
- Bash 세션을 종료합니다.
$ exit- Docker inspect를 통해 Docker에서 컨테이너의 메타데이터를 검토할 수 있습니다.
$ docker inspect [container_id]--format을 사용하여 반환된 JSON의 특정 필드를 검사합니다. 다음은 예시입니다.
$ docker inspect --format='{{range .NetworkSettings.Networks}}{{.IPAddress}}{{end}}' [container_id]

172.18.0.3
Deploy
이제 이미지를 Google Artifact Registry로 푸시합니다. 그런 다음 모든 컨테이너와 이미지를 삭제하여 새로운 환경을 시뮬레이션하고 컨테이너를 가져와서 실행합니다. 이를 통해 Docker 컨테이너의 이식성을 확인할 수 있습니다.
Artifact Registry에서 호스팅하는 비공개 레지스트리에 이미지를 푸시하려면 이미지에 레지스트리 이름으로 태그를 지정해야 합니다. 형식은 <regional-repository>-docker.pkg.dev/my-project/my-repo/my-image입니다.
대상 Docker 저장소 만들기
이미지를 푸시하려면 먼저 저장소를 만들어야 합니다. 이미지를 푸시해도 저장소 만들기가 트리거되지 않으며 Cloud Build 서비스 계정에는 저장소를 만들 권한이 없습니다.
- 탐색 메뉴의 CI/CD에서 Artifact Registry > 저장소로 이동합니다.
- 저장소 만들기를 클릭합니다.
- 저장소 이름으로
my-repository를 지정합니다. - 형식으로 Docker를 선택합니다.
- 위치 유형에서 리전을 선택한 후
us-central1 (Iowa)위치를 선택합니다. - 만들기를 클릭합니다.
인증 구성하기
이미지를 푸시하거나 가져오려면 먼저 Docker가 Artifact Registry에 대한 요청을 인증하는 데 Google Cloud CLI를 사용하도록 구성해야 합니다.
- us-central1 리전의 Docker 저장소에 인증을 설정하려면 Cloud Shell에서 다음 명령어를 실행합니다.
$ gcloud auth configure-docker us-central1-docker.pkg.dev
WARNING: Your config file at [/home/student_02_32afeda26918/.docker/config.json] contains these credential helper entries:
{
"credHelpers": {
"gcr.io": "gcloud",
"us.gcr.io": "gcloud",
"eu.gcr.io": "gcloud",
"asia.gcr.io": "gcloud",
"staging-k8s.gcr.io": "gcloud",
"marketplace.gcr.io": "gcloud"
}
}
Adding credentials for: us-central1-docker.pkg.dev
After update, the following will be written to your Docker config file located at [/home/student_02_32afeda26918/.docker/config.json]:
{
"credHelpers": {
"gcr.io": "gcloud",
"us.gcr.io": "gcloud",
"eu.gcr.io": "gcloud",
"asia.gcr.io": "gcloud",
"staging-k8s.gcr.io": "gcloud",
"marketplace.gcr.io": "gcloud",
"us-central1-docker.pkg.dev": "gcloud"
}
}
Do you want to continue (Y/n)?
Docker configuration file updated.
2.  메시지가 표시되면 `Y`를 입력합니다.

이 명령어는 Docker 구성을 업데이트합니다. 이제 Google Cloud 프로젝트의 Artifact Registry와 연결하여 이미지를 푸시하고 가져올 수 있습니다.

#### 컨테이너를 Artifact Registry로 푸시하기

1.  다음 명령어를 실행하여 프로젝트 ID를 설정하고 Dockerfile이 포함된 디렉터리로 변경합니다.
```bash
$ export PROJECT_ID=$(gcloud config get-value project)

Your active configuration is: [cloudshell-13525]

$ cd ~/test- 명령어를 실행하여
node-app:0.2에 태그를 지정합니다. $ docker build -t us-central1-docker.pkg.dev/$PROJECT_ID/my-repository/node-app:0.2 . => [internal] load build definition from Dockerfile 0.0s => => transferring dockerfile: 393B 0.0s => [internal] load .dockerignore 0.0s => => transferring context: 2B 0.0s => [internal] load metadata for docker.io/library/node:lts 0.4s => [1/3] FROM docker.io/library/node:lts@sha256:671ee8d49ce2a691fc3082203c5deb9522e0c80042aa0ff40c07f4a25e63668a 0.0s => [internal] load build context 0.0s => => transferring context: 58B 0.0s => CACHED [2/3] WORKDIR /app 0.0s => CACHED [3/3] ADD . /app 0.0s => exporting to image 0.0s => => exporting layers 0.0s => => writing image sha256:36c2988fda0026b9ea6c7b151eb27f6672a5855ffa0292741c3456c21101b963 0.0s => => naming to us-central1-docker.pkg.dev/qwiklabs-gcp-03-b18cb4608533/my-repository/node-app:0.2- 다음 명령어를 실행하여 빌드된 Docker 이미지를 확인합니다.
$ docker images
REPOSITORY TAG IMAGE ID CREATED SIZE
node-app 0.2 36c2988fda00 15 minutes ago 997MB
us-central1-docker.pkg.dev/qwiklabs-gcp-03-b18cb4608533/my-repository/node-app 0.2 36c2988fda00 15 minutes ago 997MB
node-app 0.1 e863a062c844 21 minutes ago 997MB
hello-world latest feb5d9fea6a5 19 months ago 13.3kB
student_02_32afeda26918@cloudshell:~/test (qwiklabs-gcp-03-b18cb4608533)$ docker push us-central1-docker.pkg.dev/$PROJECT_ID/my-repository
4. 이 이미지를 Artifact Registry로 푸시합니다.

```bash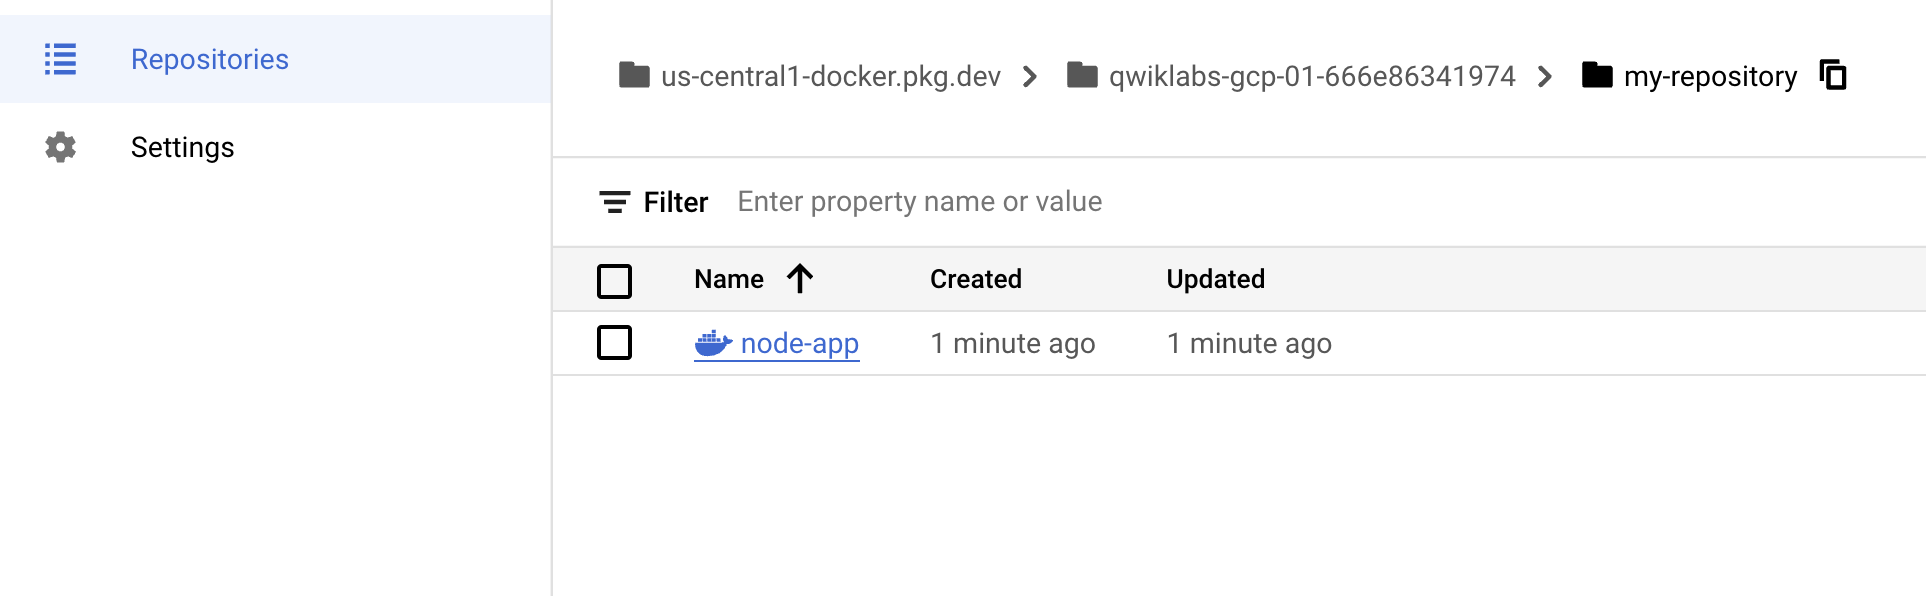
$ docker push us-central1-docker.pkg.dev/$PROJECT_ID/my-repository/node-app:0.2- 빌드가 완료되면 탐색 메뉴의 CI/CD에서 Artifact Registry > 저장소로 이동합니다.
- my-repository를 클릭합니다.
node-appDocker 컨테이너가 생성된 것을 볼 수 있습니다.
이미지 테스트하기
새로운 VM을 시작하고 SSH로 새 VM에 접속한 다음 gcloud를 설치할 수도 있지만 여기서는 간단하게 모든 컨테이너와 이미지를 삭제하여 새로운 환경을 시뮬레이션하겠습니다.
- 모든 컨테이너를 중지하고 삭제합니다.
$ docker stop $(docker ps -q)
$ docker rm $(docker ps -aq)
노드 이미지를 삭제하기 전에 (node:lts의) 하위 이미지를 삭제해야 합니다.
- 다음 명령어를 실행하여 모든 Docker 이미지를 삭제합니다.
$ docker rmi us-central1-docker.pkg.dev/$PROJECT_ID/my-repository/node-app:0.2
$ docker rmi node:lts
$ docker rmi -f $(docker images -aq) # remove remaining images
$ docker images
이제 새로운 환경이나 다름없습니다.
- 이미지를 가져와서 실행합니다.
$ docker pull us-central1-docker.pkg.dev/$PROJECT_ID/my-repository/node-app:0.2
$ docker run -p 4000:80 -d us-central1-docker.pkg.dev/$PROJECT_ID/my-repository/node-app:0.2
$ curl http://localhost:4000
완료된 작업 테스트하기
내 진행 상황 확인하기를 클릭하여 실행한 작업을 확인합니다. 컨테이너 이미지를 Artifact Registry에 게시하면 평가 점수가 표시됩니다.
'개발 > 가상화' 카테고리의 다른 글
| kubernetes_gcloud_3_Kubernetes를 통한 클라우드 조정 (0) | 2023.04.25 |
|---|---|
| kubernetes_gcloud_2_ Kubernetes Engine(Qwik Start) (0) | 2023.04.20 |
| Apache Mesos, Kubernetes 비교 (0) | 2022.09.15 |
| docker | error : Failed to get D-Bus connection: Operation not permitted (0) | 2022.07.14 |
| kubernetes | 우분투 kubernetes 설치 (0) | 2022.07.06 |